To set up your Noteflight learn site, please follow these steps:
1. Log into www.noteflight.com using your user name / email and password.
2.While logged into Noteflight, go to this page: https://www.noteflight.com/site/admin#/newSite
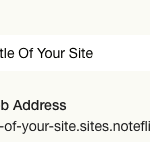
3. Choose the title of your Noteflight Learn site and supply a description and image if you like, then click “Add Site”. This creates a brand new site with its own URL ending in “.sites.noteflight.com“.
Your site will now be accessible in the left sidebar menu:
Note: Sometimes students will incorrectly try to log in at www.noteflight.com. But their account exists only in your Learn site, with its own unique web address (URL) formatted like “sitename.sites.noteflight.com” (with no www). Please make sure students are logging into this site.
4. To make scores visible to those outside the site:
Site > Overview > Settings > “Make this site public.”
This does not make the whole site open to the public; it only means that scores you choose to share publicly will be visible to those with a link. This is useful for sharing student work with parents, administrators, etc.
5. Add students or teachers by using the Manage Site Icon in the header.
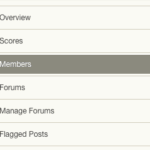
6. Select “Members” on the left column
7. Add students by selecting “Add Students”, or add teachers by selecting the teachers tab then “Add Teachers”.
8. Enter usernames in the box by typing or copy-pasting one per line.
9. You may set a password for all users or just leave this field blank. If you set a password, new members may now log in to your site with their new username and given password. Or if you left the password field blank, tell users to leave the password field blank the first time they log in, and they will be prompted to create their own password.
View our August 2016 Introduction to Noteflight Learn Webinar

